
If you are looking to change your domain nameserver and move to a new provider, it can seem like a daunting task. However, with the right steps and knowledge, it can be a seamless process.
In this blog post, we will discuss the steps you need to take to change your domain nameserver and move to a new provider, as well as explore some of the different providers available.
What is Domain Nameserver?
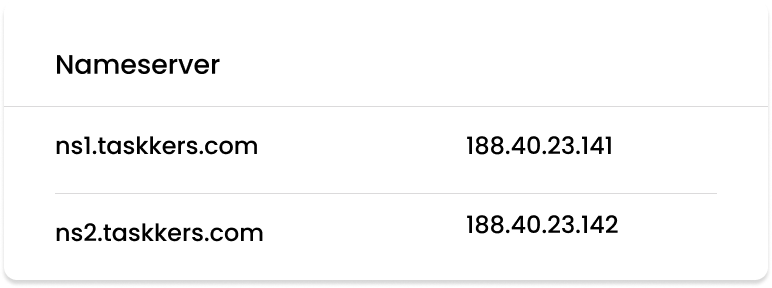
Before we dive into the steps you need to take to change your domain nameserver, it’s important to understand what a nameserver is. A nameserver is a server that translates domain names into IP addresses, allowing computers to communicate with each other. When you type a domain name into your web browser, the nameserver is responsible for directing you to the correct IP address for that domain.
When you purchase a domain name, it typically comes with default nameservers provided by the domain registrar. These nameservers tell the internet where your domain is hosted and how to find it. However, you can change your nameservers to point to a different hosting provider or server.
How to Change Domains NameServer?
- Log in to the domain registrar’s website where the domain is registered.
- Locate the domain management section and look for an option to edit the domain’s nameservers.
- In the nameservers section, remove the current nameservers listed and replace them with the new nameservers you want to use.
- Save the changes.
- It may take some time for the new nameservers to propagate across the internet, so be patient. This process can take up to 48 hours, although it is often much faster.
- Once the propagation is complete, the domain will be using the new nameservers and pointing to the associated web hosting or other services you have set up.
Why Change Nameservers for Domains?
Here are some reasons why you might need to change the nameservers of a domain:
- Hosting: If you are moving your website to a new hosting provider, you will need to change the nameservers of your domain to point to the new hosting provider’s DNS servers. This will ensure that visitors can access your website from its new location.
- DNS Management: Changing the nameservers of your domain can also give you more control over your DNS settings. By changing the nameservers to a third-party DNS provider, you can configure advanced DNS settings such as custom TTL (Time to Live) values, DNSSEC (DNS Security Extensions), and more.
- Email Hosting: If you are using a separate email hosting provider, you may need to change the nameservers of your domain to point to the email provider’s DNS servers. This ensures that your email service is properly configured.
- Reselling: If you are reselling domain names or hosting services, changing the nameservers of a domain can allow you to manage DNS settings on behalf of your clients.
How to Change Domain Nameservers From the Different Service Providers
As mentioned earlier, there are many different domains and hosting providers to choose from. Each provider has its own features, pricing, and support, making it important to choose the right one for your needs.
How to Change Hostinger Nameservers
Go to https://www.hostinger.com and sign in to your Hostinger account.
Navigate to the “Domains” section of your account by clicking on the “Domains” button on the main dashboard.
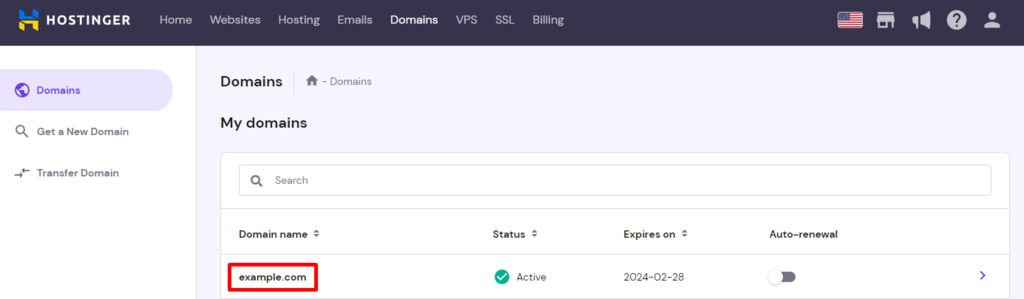
Find the domain you want to modify the nameservers for and click on “Change” next to it.
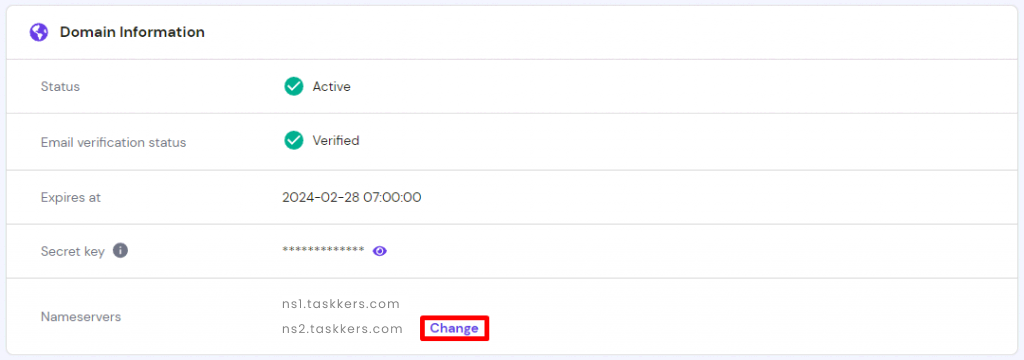
At the top of the screen, select the “Name Servers” tab.
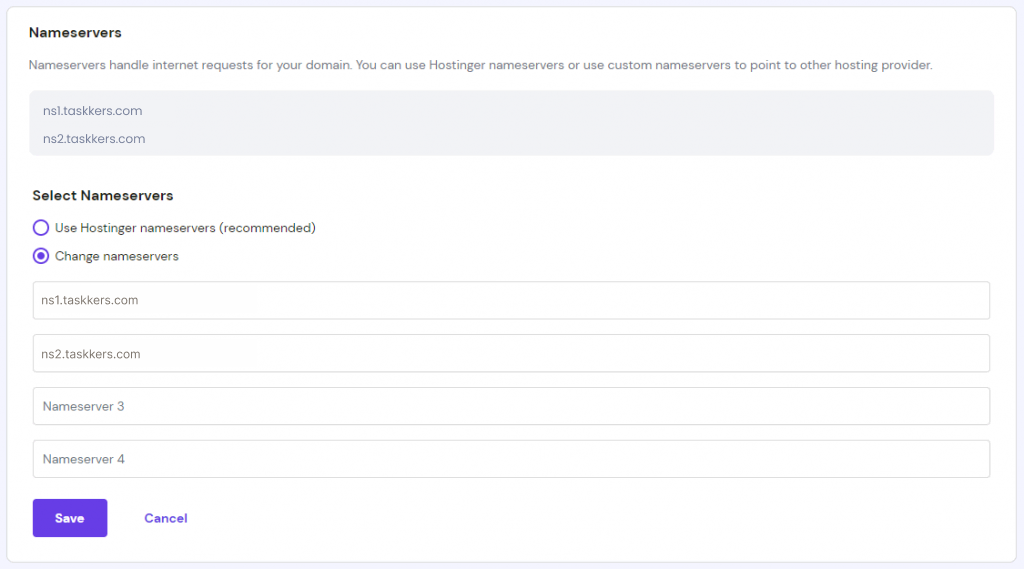
Select the “Use custom nameservers” option.
Enter the new nameservers you wish to use. Typically, these will be provided to you by your web hosting provider.
After adding the new nameservers, click the “Save” button.
How to Change GoDaddy Domain Nameserver
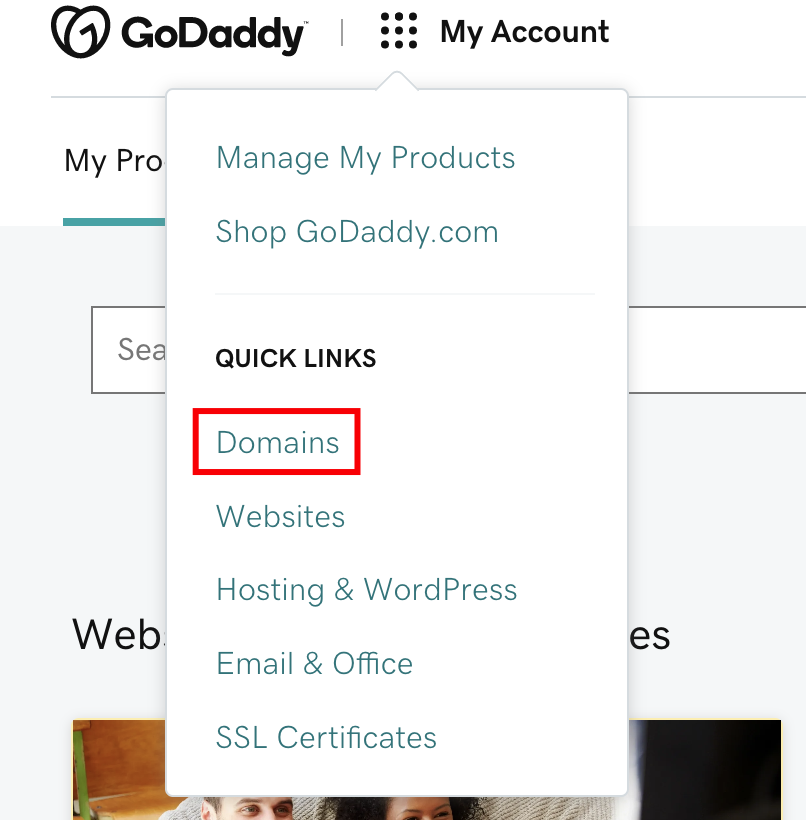
Once you’re logged in, click on your name in the top right-hand corner of the page and select “Manage My Domains” from the drop-down menu.
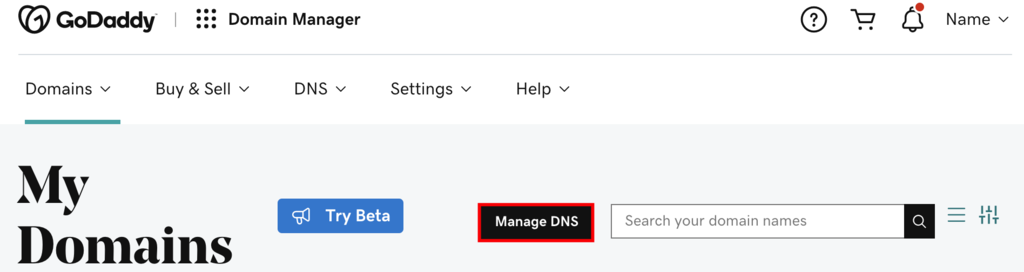
Find the domain for which you want to change the nameservers and click on it.
Scroll down to the “Nameservers” section and select the “Change” button.
Choose the option “Enter my own nameservers” and enter the new nameservers in the fields provided.
Enter the new nameservers in the correct order. Typically, there are two nameservers, and you’ll need to enter them both. You can get the new nameservers from your new hosting provider.
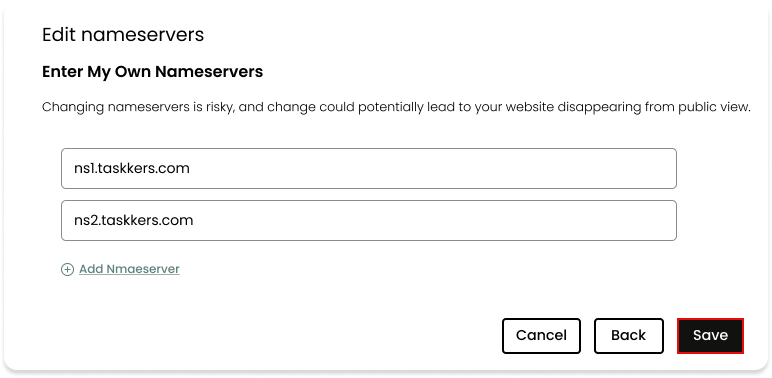
Once you’ve entered the new nameservers, click the “Save” button to save your changes.
The changes may take some time to take effect. This might take anything from a few hours to a couple of days.
That’s it! You’ve successfully changed your GoDaddy nameservers. Remember that any changes to your domain’s nameservers can take some time to propagate, so be patient and allow time for the changes to take effect.
How to Change Namecheap Nameserver
Go to the Namecheap website (www.namecheap.com) and log in to your account.
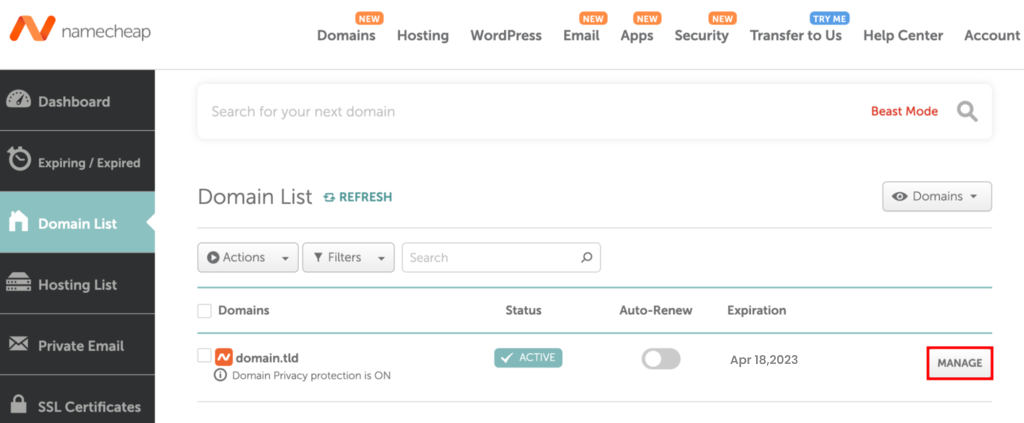
Navigate to the “Dashboard” section and select the domain name you want to change the nameservers for.
Scroll down to the “Nameservers” section and select the “Manage” option.
Select “Custom DNS” from the “Nameserver Settings” page.
Enter the new nameservers that you want to use in the provided fields. You’ll typically have to enter at least two nameservers.
Click on the “Save Changes” button to apply the new nameservers to your domain.
It may take some time for the changes to spread over the internet, so be patient. The amount of time it takes will vary, but it could take anywhere from a few minutes to several hours.
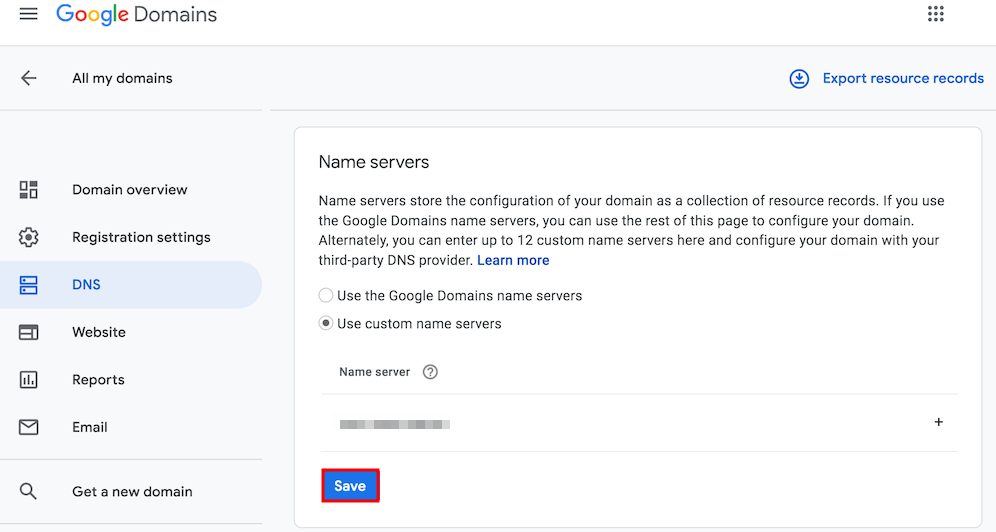
How to Change Google Domain Nameserver
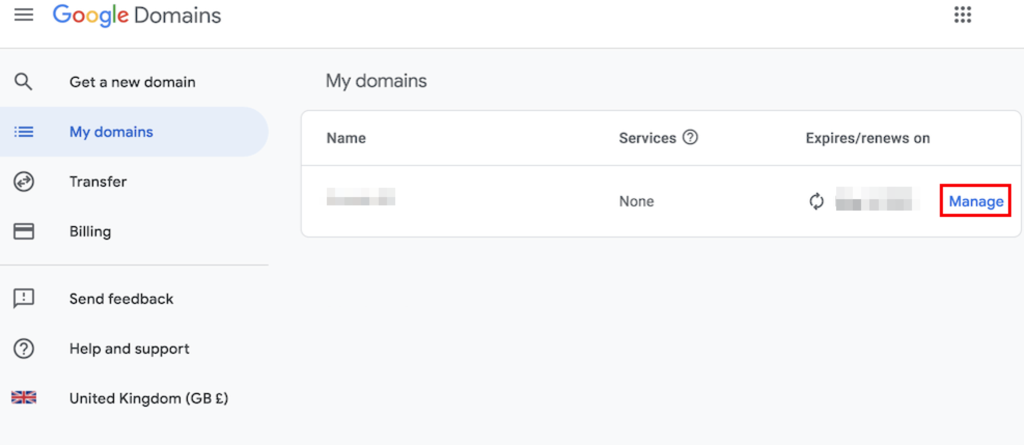
Go to the Google Domains website and log in to your account.
Once you have logged in, you will see a list of your domains. Click on the “manage” button of domain name that you want to change the nameservers for.
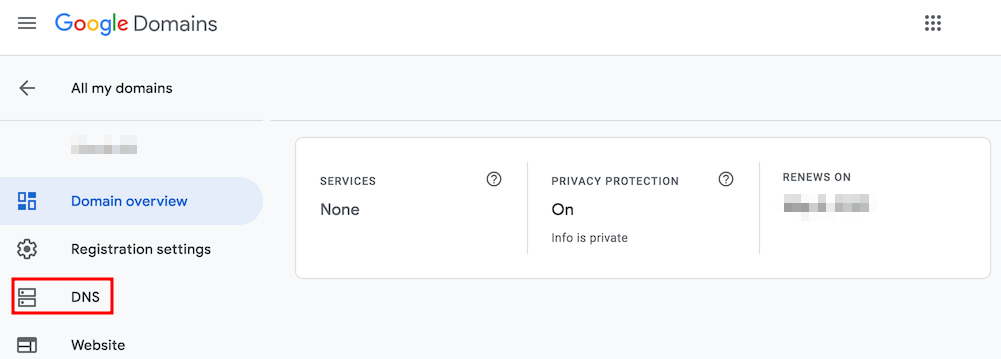
Scroll down to the “Name servers” section on the domain settings page and select the “Use custom name servers” option.
A new section will appear, navigate to the DNS page
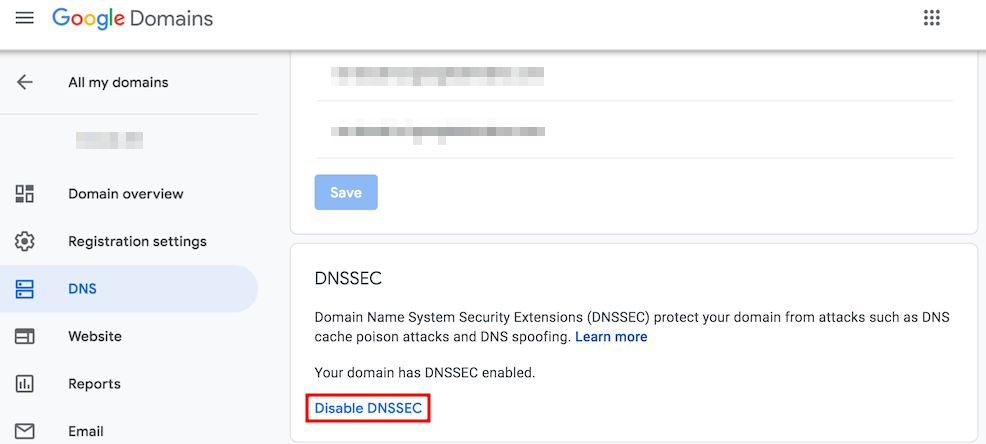
Click the Disable DNSSEC button on the DNS page. This step is required to change nameservers successfully.
Once you have entered all of the nameserver addresses, click the “Save” button to save the changes.
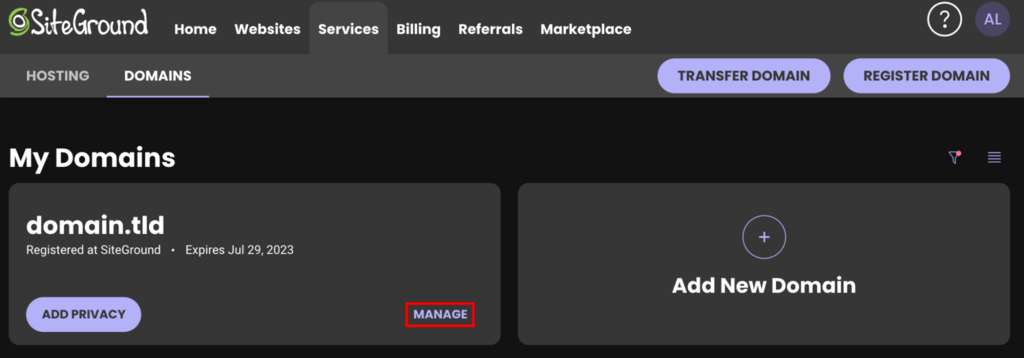
Changing SitGround Nameservers
Log in to your SitGround account.
At the top of the page, select the “Domains” tab.
Select the domain you want to modify and click on the “Manage” button next to it.
Scroll down to the section “Nameservers” and click the “Change” button.
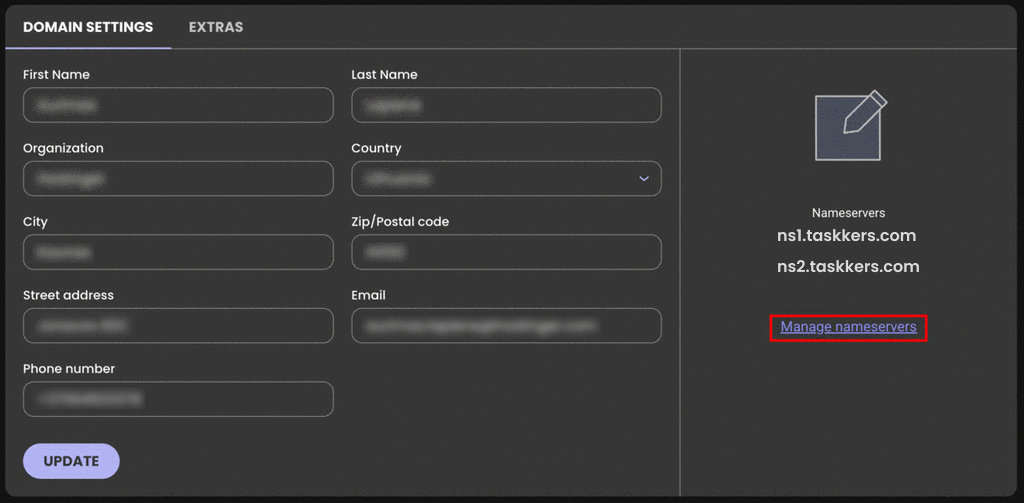
Choose the “Custom” option from the drop-down menu, which will allow you to enter your own nameservers.
In the “Nameserver 1” and “Nameserver 2” fields, enter the new nameservers you wish to use.
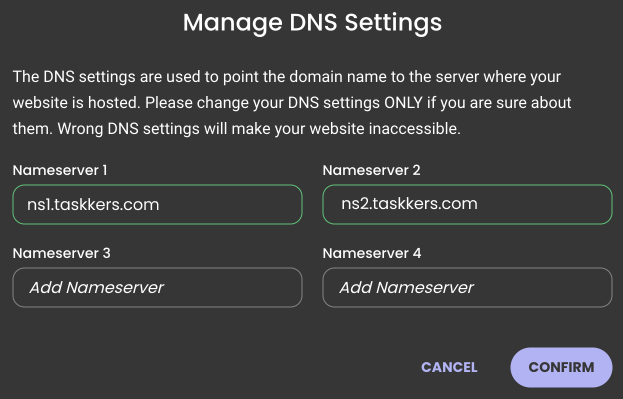
Click on the “Save” button to save your changes.
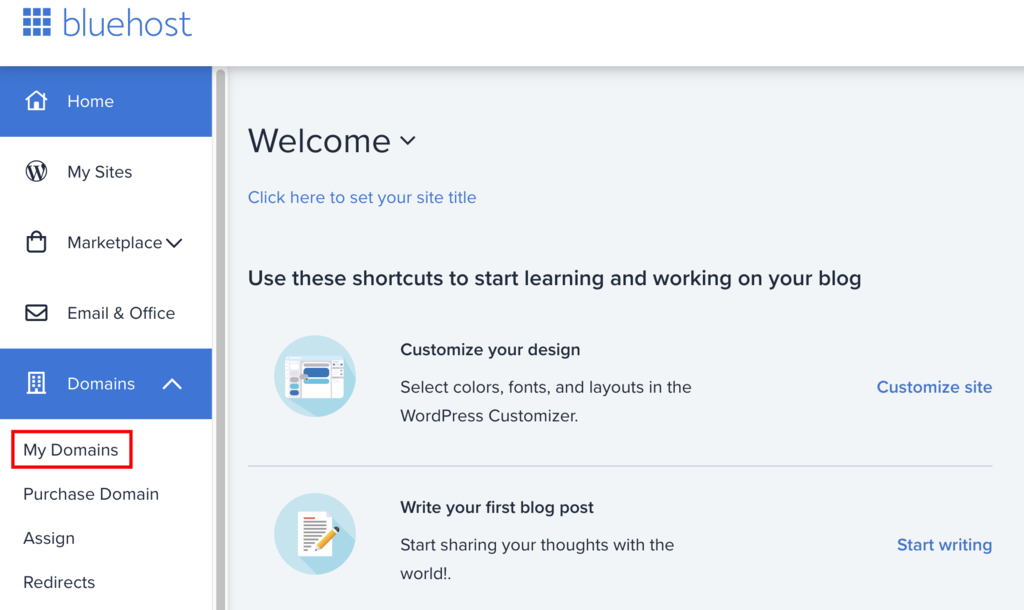
How To Change Bluehost Nameservers
Log in to your Bluehost account: Go to the Bluehost homepage and click on the “Login” button in the top right corner. To access your account, enter your login information.
Navigate to the Domain Manager: After logging in, you will see a dashboard. Click on the “My Domains” tab to go to the Domain Manager.
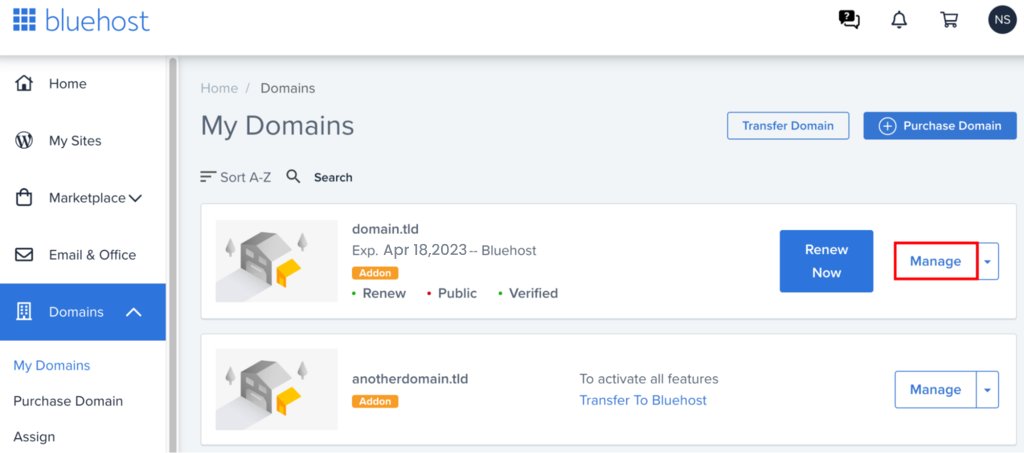
Select the domain name: In the Domain Manager, locate the domain name you want to change the nameservers for and click on the “Manage” button on the right side of the domain name.
Go to the Nameservers section: After clicking on the “Manage” button, you will see a new page with various options for your domain. Look for the “Nameservers” section and click on the “Edit” button next to it.
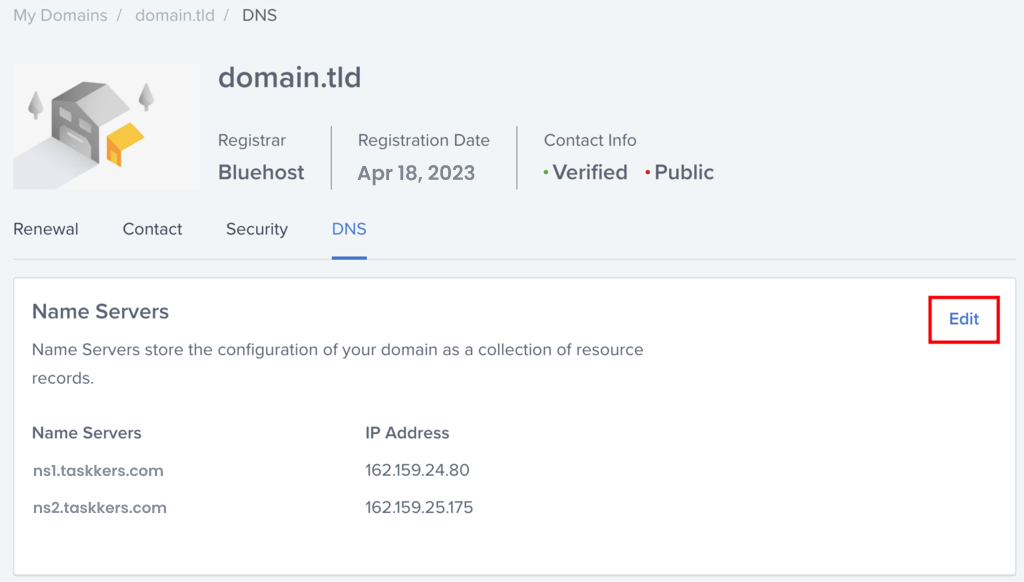
Enter the new nameservers: In the “Nameservers” section, you will see two empty fields where you can enter the new nameservers. Replace the existing nameservers with the new ones that you want to use.
Save the changes: Once you have entered the new nameservers, click on the “Save Nameserver Settings” button to save your changes.
Steps to take after changing Nameservers
- Verify that the nameservers have been updated: It can take up to 24-48 hours for the changes to propagate across the internet. You can verify the update by checking the domain WHOIS information or by using an online DNS checker tool.
- Update your DNS records: If your DNS records were not transferred automatically, you will need to update them manually with your new host’s DNS settings. A, MX, CNAME, and other records are included. You can usually do this through your domain registrar’s control panel or your hosting provider’s dashboard.
- Wait for DNS propagation: After updating the DNS records, you will need to wait for DNS propagation to complete. This can take up to 24-48 hours, although it is usually much faster.
- Test your website: Once DNS propagation is complete, you should test your website to ensure that everything is working as expected. Check that all pages are loading correctly, that any forms or scripts are working, and that emails are being sent and received properly.
- Check your email: If you use an email with your domain name, you should check that your email is working correctly. Test sending and receiving emails from different email addresses to ensure that everything is working properly.
- Monitor traffic and analytics: After making any significant changes to your website, it’s a good idea to monitor your traffic and analytics to ensure that everything is functioning correctly. You can measure your website traffic and activity using tools like Google Analytics.
Conclusion
In conclusion, changing domain nameservers is an important task that allows you to point your domain to a different hosting provider or website. By following the steps outlined in this guide, you can easily change your domain nameservers and ensure that your website or application is up and running in no time.
To recap the main steps:
- Locate the domain you want to update and access the domain management settings.
- Navigate to the nameservers section and choose “Custom Nameservers.”
- Enter the nameservers provided by your new hosting provider.
- Save your changes and allow up to 48 hours for the changes to propagate across the internet.
By following these steps, you can quickly and easily update your domain nameservers and ensure that your website or application is properly connected to your hosting provider. Remember to double-check your changes and allow time for the changes to propagate to avoid any potential issues.
We hope, you find this blog useful and If you have any questions or concerns regarding changing domain nameservers, please leave a comment below.